About Me

Lindsay M Starr is a beadwork and mixed media artist currently based in Nashville, TN. She spent her early childhood in Alaska, and her school age and college years in Oregon. Lindsay has a great appreciation for history, science, and nature and is consistently inspired by insects, sea life, color, and the significance of beads and beadwork throughout human history. She spends her days beading, walking at the zoo, and practicing yoga. Lindsay loves to share her knowledge and passion for beads and beadwork to hobbyists of all skill levels.

Tuesday, October 14, 2014

Jet Black Challenge!

In my numerous searches for challenges and blog hops to keep myself occupied, I stumbled across a fun blog that runs monthly themed challenges, Operation Tackle That Bead Stash.  October's theme is Jet Black - you can only use black beads!  No other colors, and we all know how much I love creating in monochrome...wait, where's my sarcasm font?
At least I had an idea.  I had recently seen someone make a super long pendant necklace using large two hole beads, and decided to attempt something inspired by that.  Something lightweight, but with much graphic visual impact.  This is where I ended up:

I used quite a few vintage glass beads in this necklace - all of the rounds in the strap, the faceted 2-hole sew-on above the ring, and the 3-hole bead below the ring (middle hole is unused).
I love that large Czech pressed glass square 2-hole bead - like a giant tile!  I think this is only the second or third time I've used rizo's...I love their little spikey presence in the bottom loops.  
I had originally intended just to use this glass ring as a connector...but it needed a little bit more texture.  So I made a couple of warped squares that ended up fitting into the center of the ring - stitched them together, and around the ring for stability, leaving enough room at the top and bottom for everything to swing freely.
I used a TierraCast J-hook and ring as a clasp...I love how the granulation on the edges mirrors the texture of the beads.  I am going to have to look through my stash for more two holed beads...I would like to attempt more necklaces like this in different colors!  It would make a great holiday staple for someone!  
Ah, the sun came out momentarily for this picture - love the shadows!  This necklace is listed in my Esty shop, and don't forget to keep up with my daily beading exploits on my Facebook page!  I will edit this post with a link to the blog challenge as soon as they post it - there is still plenty of time to enter if you are so inclined.  Thanks for looking!

Monday, October 13, 2014

Flounder Challenge Necklace

There is an awesome group on Facebook for us freeform addicts - Freeform Peyote Beading.  If you do any freeform peyote stitch, I strongly recommend that you join this group - everyday someone posts a piece they've made that will inspire you to try something new.  This month the group is having a challenge to use any shape of the new 2-hole seed beads in a freeform peyote piece.  This is my first attempt!  I suspect I'll give it another stab or two before the month is up, but I just had to show you this necklace now!
I have had this raku flounder button for a long time - I don't know the artist.  I'm pretty sure it wasn't labeled when I bought it.  He's been sitting in my stash, looking up at me sorrowfully every time I opened the box, asking when I would build the perfect environment for him.  Well this project turned out to be it!  I actually chose the mix of purple twins first, then added the dark aqua seed beads.  In my search for accent and focal beads, the flounder said to me "Look, that's my purple!  I belong here!"  And so I started creating an undersea realm for this little guy...
I stitched the piece of circular peyote that the flounder sits on first.  If you've ever done circular peyote, you know that the larger it gets, the more tedious and challenging it is.  Your bead count increases dramatically each row, and it's hard to retain a flat shape.  Even one extra bead will lead to a ruffle 3 or 4 rows later, and it's nearly impossible to figure out where the problem originates from.  What I loved about using the twins (and what I love about them in general for freeform applications), was their irregularity - I could choose exactly the width I needed for each stitch.  Each row of twins adds as much width as 3 or 4 rows of stitching with seed beads, so they make circular peyote go much faster too.  And the unexpected bonus of the finished disk looking like ripples in water?  Love it!
Next I stitched the bubble freeform.  I've made these several times in the past, though never incorporating 2-holed beads.  I like to use pieces like this as part of a front closure.  And as the flounder was a button, I knew that the largest bubble needed to fit over him with room to spare.  This makes the closure of the necklace.  I know the bubble looks WAY huge for the button...but the reality is that the weight of the flounder, circular peyote, seaweed and embellishment, hold the necklace closed with gravity.

I also felt the need to incorporate the flounder's green in the piece - after all, flounder's are camouflage ambush predators.  He needed some seaweed to hide in!  I drug out some matching olive green seed beads, teal twins, and some copper lined amethyst 11/0's and went to ruffle-town.
Because I used alternating 8/0 and 11/0 beads in the first row, I was able to string the strap through some of the seaweed beads.  This allows the seaweed to be tall, but not take the brunt of the piece's weight.
I also included some lampwork beads on the purple/blue side of the strap.  The larger bead is by Jan Onipenco of Molten Mayhem, and the smaller one is by Sharon Ryman of Catalina Glass.  I used various Czech pressed glass and seed beads for the rest of the strap.
And the beauty shots!


I think I like this picture the best!  I wore this necklace when we went to Costco yesterday...and I had to go scrounge in my purse for a business card because a woman just about took it off my neck.  I love getting that kind of reaction from a random passerby...it tells me I'm doing the right thing!
As always, you can keep up with me on my Facebook page, and shop on Etsy at any time!  Thanks for looking!

Wednesday, October 8, 2014

Art Bead Scene October 2014 Challenge

It's that time again.  Time for the Art Bead Scene monthly blog challenge!  Well ok, not really...the deadline isn't until October 31st, but I have a ton of projects this month and figured I'd get a head start on the ones I can do now.  After last month's challenge, I was a little worried about what the inspiration art piece would be.
Ok, so it's a little unlikely at first - definitely not in my color comfort zone, but it grew on me.  Especially when I decided to really make the blue and white trees the main part of my design.  Because they have such different shapes and textures in the painting, I knew I would want to use completely different stitches to make them.  I started with the blue tree:
Man, it took me half the day to finish it, but when I got done and laid it next to the picture, I was super happy!  Of course the color is a little off...this tends to happen with you're working with what you already have.  But I got close enough, and was so energized that I worked the rest of the day on the white tree, and orange hill:
At this point I took a break for a day, and just spent some time staring at the art beads I had picked out, figuring out their placement, and what else I would need for the other elements of the piece.  When I sat down next, this happened:
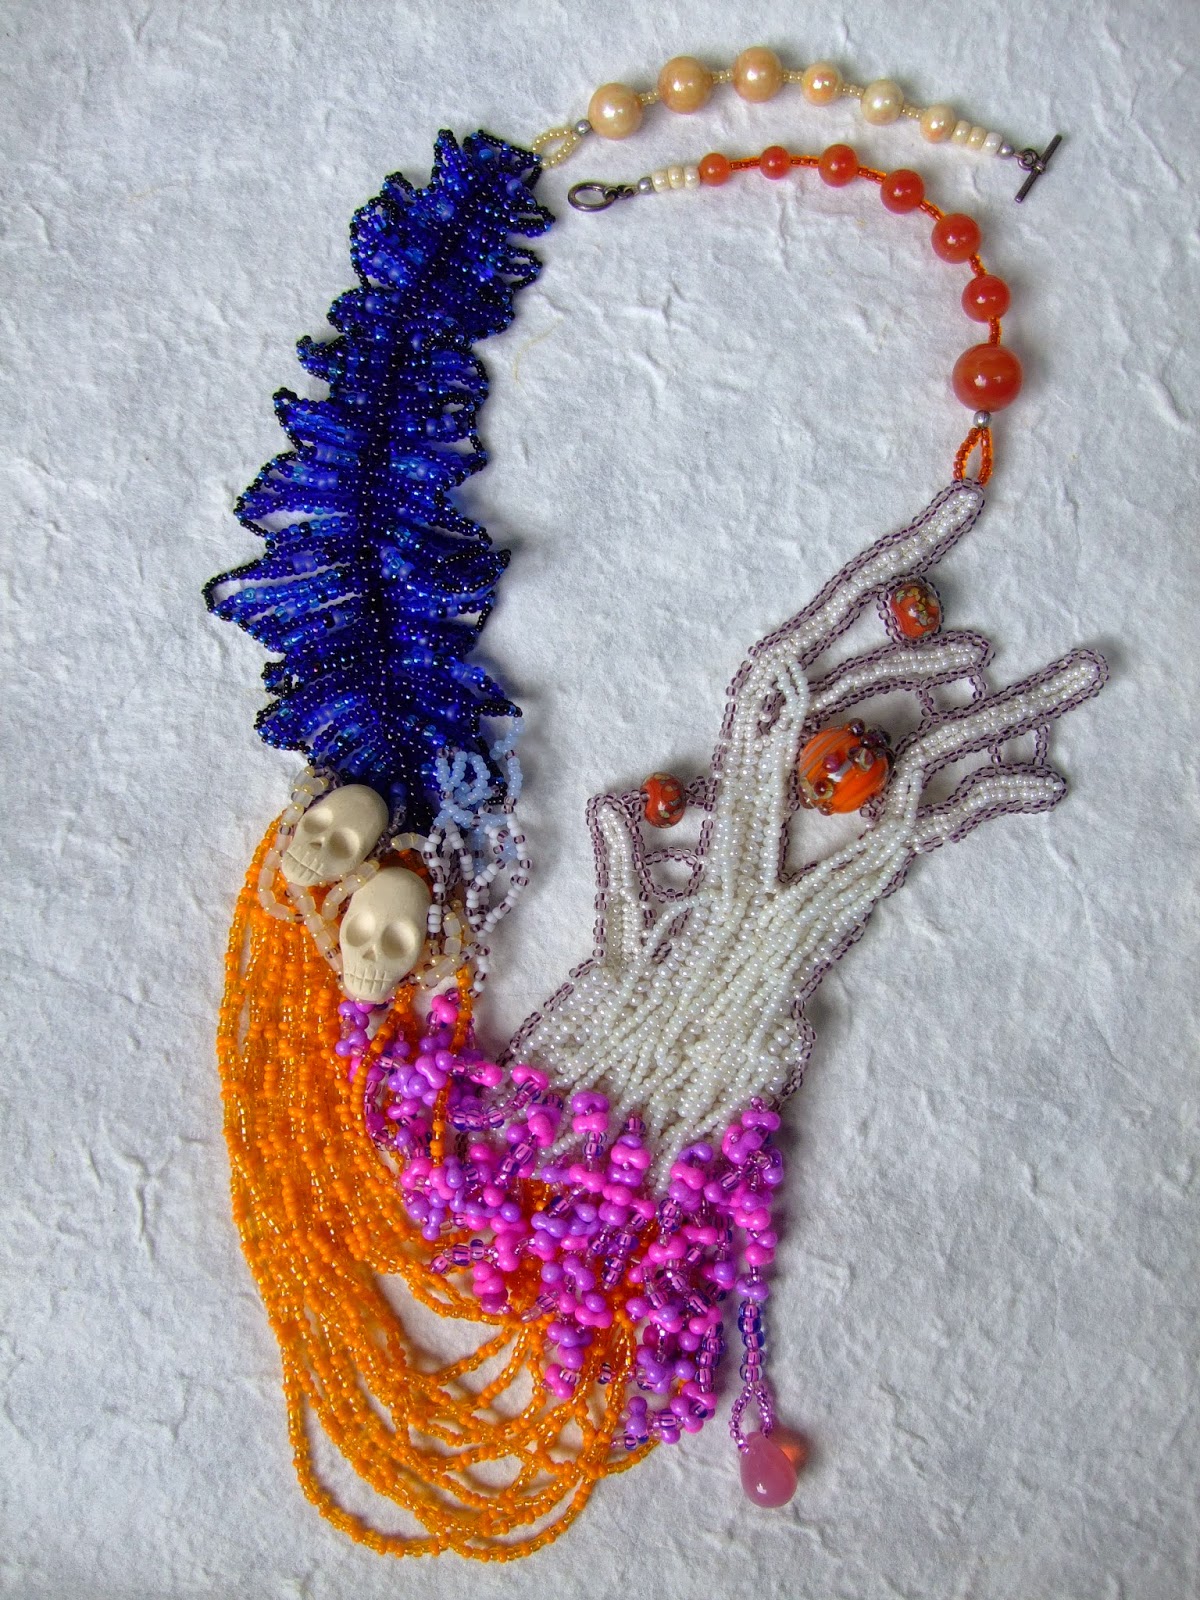
What a difference, right?  Lets walk through all the elements:
Close up of the blue tree.  I know you've already seen it...but this is still my favorite part of the piece. 
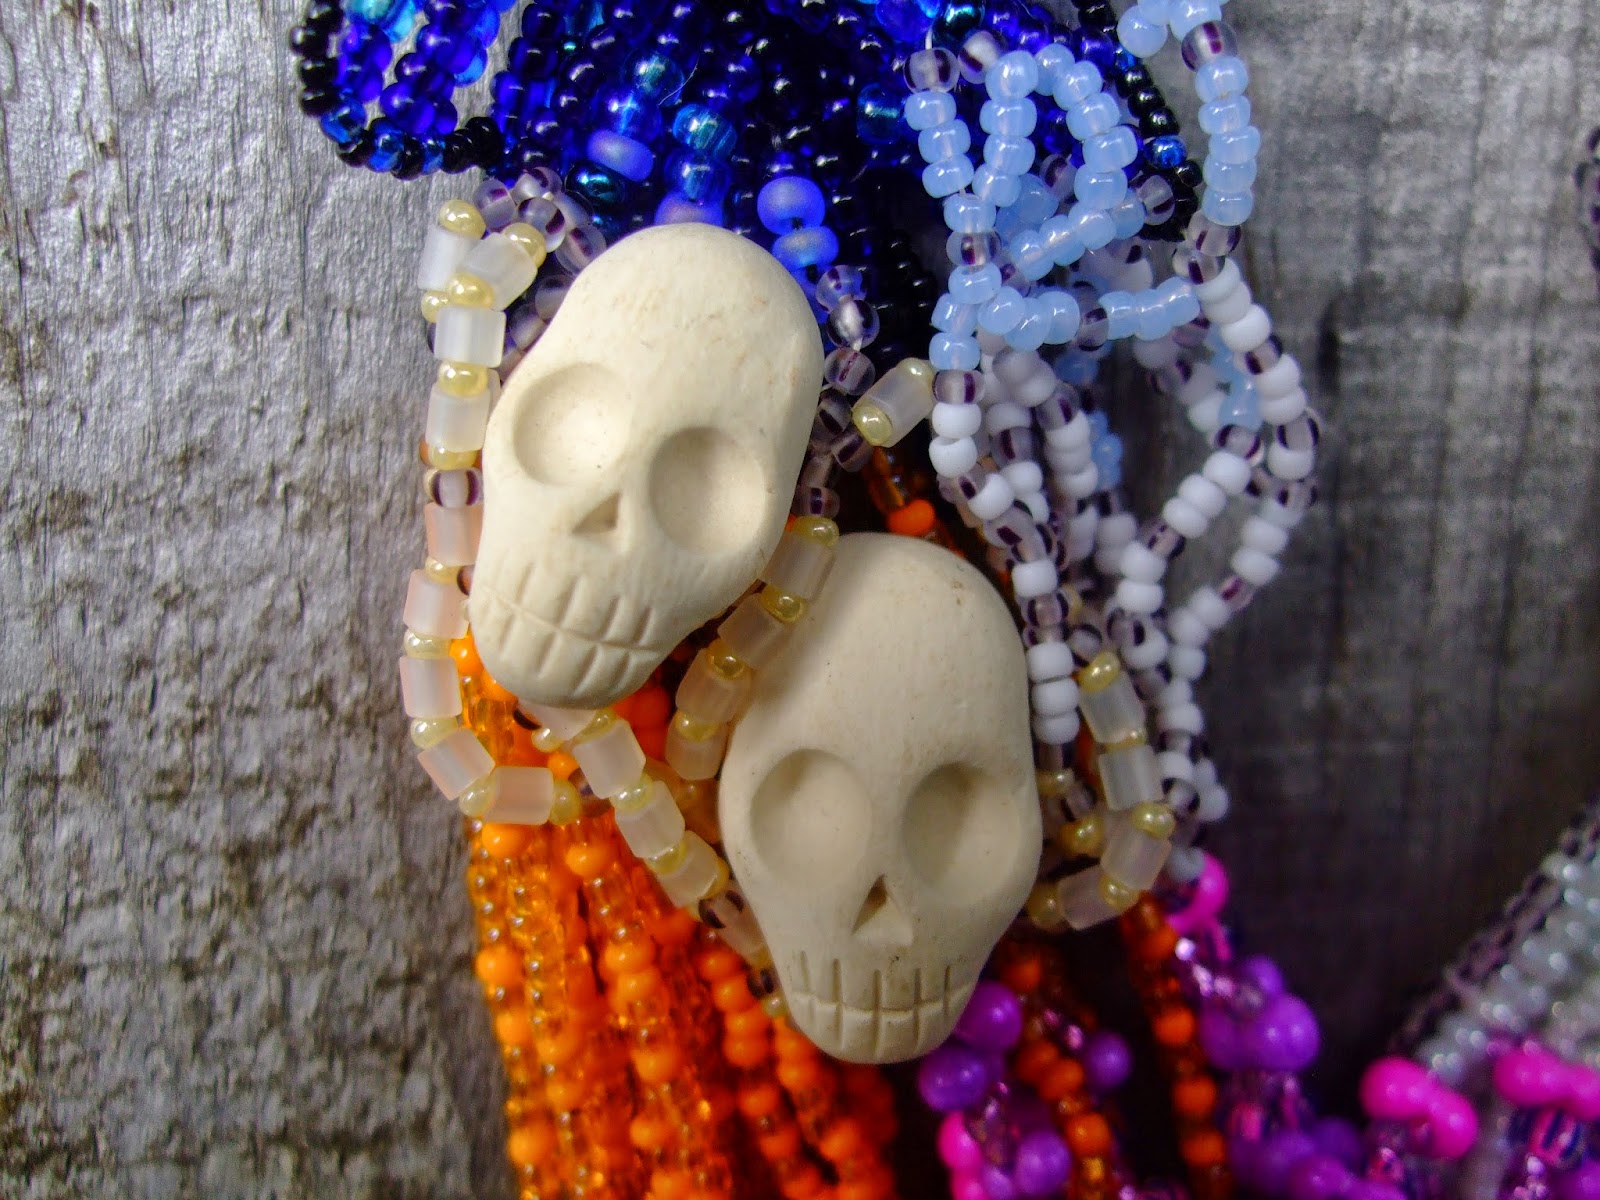
These two skulls are made by an Oregon ceramic artist, Dana Swisher.  As far as I can tell, she does not have an online presence at all.  I get her beads and pendants at Kaleidoscope Studios when I visit back home.  I used some lighter colored seed beads to mimic the little bush at the base of the blue tree, and nestled the skulls in the bush.  It is an October challenge, after all!
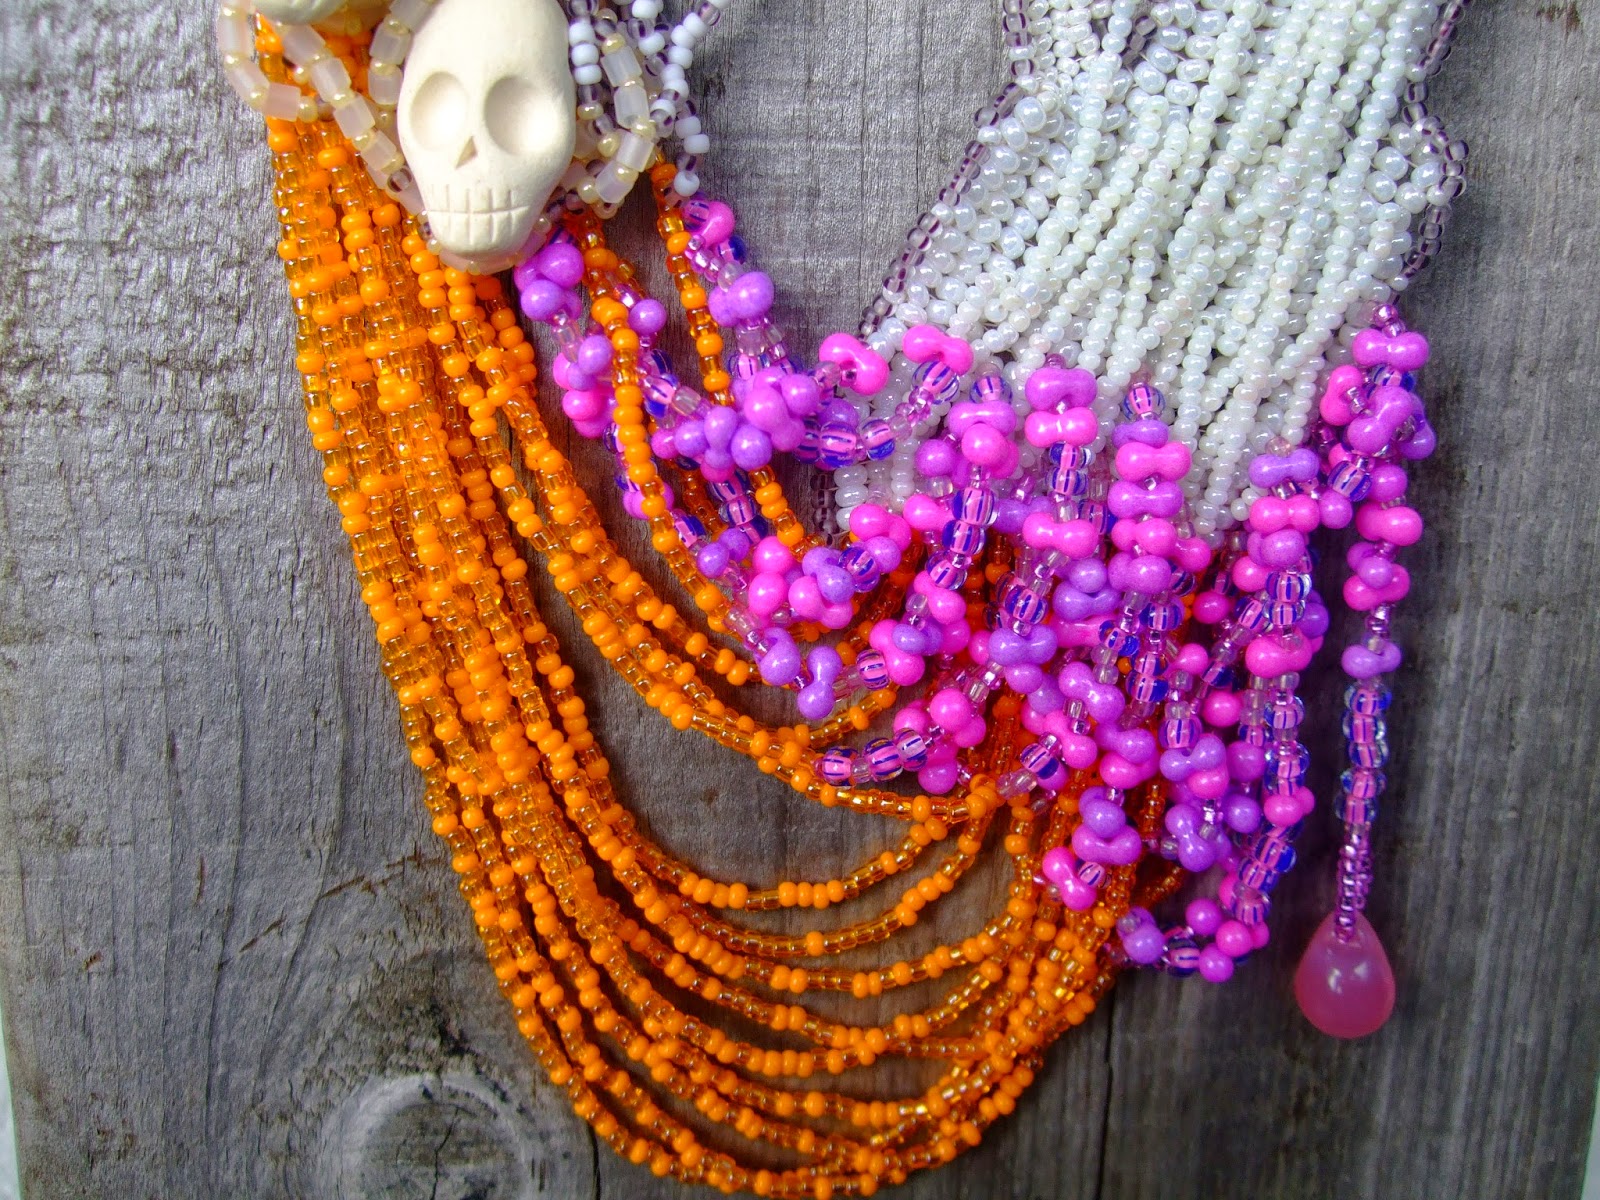
When I first saw the inspiration art, I had some anxieties about incorporating the pink/purple section.  Firstly, I didn't even know if I had enough beads in that color.  Secondly...PINK...ew.  But, using a combination of two different colors of 11/0's, a 6/0, and two colors of large Czech farfalle (peanut) beads, it definitely resembles the swath of pink through the painting, down to the variegation.  I had to throw in one of my favorite shapes too...a nice fat drop to end the single fringe. 
For the white tree, I started with a base of freeform herringbone.  I edged it, mostly to stiffen it up, and made a few circular bridges between the branches to keep them in shape.  It looked a bit one-dimensional, so I added some embellishing layers on top of the herringbone for texture.  Then I stitched some of my buddy Jan Onipenco's lampwork beads in-between the branches.  She has a Facebook page for her Molten Mayhem lampwork beads, and an Etsy shop as well.  I love that they not only incorporate the orange of the distant hill and trees, but also the pink/purples.  Here is a closer view of them:
With a necklace this involved, I often opt for a simple strung strap.  In this case, I knew that one side needed to be the creamy color of the sky, and the other needed to be the darker orange of the distant trees.  I went with some vintage Japanese lampwork beads that I've been hoarding for years, and spaced them out with coordinating seed beads.  A tiny TierraCast toggle finishes off the necklace.
And, I always have to try for a beauty shot - this one showcases all of the incorporated art beads in one fell swoop.
Again, thank you to the awesome team at the Art Bead Scene blog for hosting these challenges every month!  As always, you can follow my daily bead exploits on my Facebook page, or browse my Etsy shop at any time!  You can follow along as all of the participants add their photos to the Pinterest board.  I will edit this post with a link to the blog hop at the beginning of November when they post all the participants!  EDITED 10/31/14 - the reveal post is up!  Check out all the cool stuff over on the Art Bead Scene blog!

Monday, October 6, 2014

The Studio...aka Living Room

Some of you already know that we have recently moved back to Nashville TN, after living in Knoxville for several years.  While in Knoxville, we were able to afford a 2 bedroom apartment...yes, I had a bead room all to my self!  Well, we tried to use it as a shared craft room for awhile, but with two large crafts, and both of us with the need to creatively sprawl, we were constantly resenting the other person's stuff in our way.  Plus, for some reason Keven doesn't like stepping on stray beads and needles...I don't know why?  So his leather and workbench ended up in the dining area of the living room, and we were both much happier.

Then we moved.  It proved to be quite difficult to find an apartment on (very) short notice, in our price range, with 2 bedrooms.  We ended up having to downsize by about half the square footage, and half of our stuff is now housed in a storage unit.  All of the leather and the big work bench is at the storage unit, but it's working out ok for Keven...we're only 5 minutes from his shop, and he can just bop over there and crank up his music on the weekends if he wants to tool.  My studio is now housed in 3/4 of the living room, and that's what I'm going to talk about today.

So this is where I sit and bead or compute!  I've got natural light from the porch, plus a large task lamp and my brand new OttLite.  The small table on the far side of the bead chaise holds my OttLite, and other small necessities on top, plus boxes of findings, tools, and wire on the shelf below.  In front of the table on the floor (you will have to use your imagination) is a basket that catches other random things I use regularly.  I bead mostly on a bed tray from Ikea, and my computer and other important items reside on the laptop table at the foot of the bead chaise.
On my bead tray right now are an assortment of herringbone ropes - I'm going to be making these for a few days, just stocking up for future projects.

Across from the bead chaise is a crazy mess of storage:
The bookshelf to the left contains all of my bead books and magazines, plus other arts and crafts books.  I'm sure you can see that they've overflowed onto the floor...oh well, I did attempt to clean up!  The boxes next to it contain packing materials and lots of earrings (lower box), plus papers and leather scraps (top box).  I've tucked a folding table (in case I need to cut or sew), and my leather...I just couldn't leave it at the storage unit.  Then comes the bead storage!  It's actually more than it looks like...I hate storing air.  I'm quite fanatical about wasted space in my storage containers.  So everything is stored VERY compactly, and there are a few boxes of things in other areas of the apartment too.  On the top of the storage cubes and hanging on the wall are jewelry displays and my wall art pieces.  And the tv...you can see my bagpipe music playing on Pandora.
If you pan a bit more to the right you come to the end of the bead storage, my clock cabinet, and my whiteboard where I keep track of upcoming challenges and projects, along with other important information.  It just wouldn't do to forget my weekly yoga class!  You can even see the inspiration painting for the October Art Bead Scene blog challenge.

In the past, I've always kept the bead storage close around my bead chaise, but I'm finding that I love being able to sit facing my beads and art - they're a constant inspiration and reminder of what I'm capable of.  It's also good to see the stash, because I often see a box and think about what's in it, and if there's something that I might use on my current project.

I also have a constant companion, my cat Gigi.  We have a bit of a love/hate relationship, as she is quite prickly and I am totally oblivious to the random things I do that annoy her.  But she's always nearby while I'm working.  Either sprawled on the floor, on her scratching post next to the bead chaise, or (like today) hanging out on the porch when the weather is nice.

Thank you for looking!  I'm off to find some breakfast, run to the post office, and get some laundry going while I bead later.  As always you can follow my daily work on my Facebook page, or visit my shop on Etsy.  I'll be back tomorrow with my first blog challenge for October!

Wednesday, October 1, 2014

Benefit Auction for New Growth Necklace

Hello all!  Tragedy struck a friend of mine this Monday, September 29th.  He, his girlfriend, her toddler son, and 40 other people, were made homeless by a raging apartment fire in Antioch TN.  You can read the news report about the fire HERE.  Although the fire did not originate in their unit and some hard items may be salvageable, all soft items like clothes, furniture, and books are lost due to smoke and water damage.  

I cannot imagine what we would do if we were in their situation, so I am auctioning off a necklace and matching earrings on my Facebook page.  Auction starts now, and ends Friday (10/03) at 12 midnight, PST.  All information can be found on the Facebook picture, and all bidding will be handled there in the comments.  


I wanted to show more detailed pictures and descriptions of the piece here so multiple pictures don't confuse the Facebook bidding. 

The focal point of the necklace is one of my polymer clay faces, in a silvery lustrous green with a satin finish.  To go with it, I chose a palette of rich emerald greens and glistening grays, so the face would remain the central focus of the finished piece.  Here you can see my work tray with the capture for the face just barely started.

 
I continued with this palette for the entire capture - here is the front when I finished it, before embellishment:

And, as many of you know, the back of the capture is as interesting at the front:

As I was working on the capture, I was also thinking of how I wanted to embellish the face.  I started thinking about the concept of "new growth", and how we all hit setbacks in life, but somehow survive and grow through them.  Not only does this theme resonate for the purpose of this benefit auction, but also personally for me...and probably a lot of other people.  

Along these lines I decided to use some vintage glass leaves in the looped fringe, and vintage glass flowers as surface embellishment on the face.  They are a subtle transparent grey in color, and don't distract from the serene face.  This necklace reminds me of greenery that has had a brutal pruning, but recovers and grows more beautiful and stronger than before.  


The strap is partially strung with seed beads and sparkly peanut beads, and partially a weighty textured chain, antique silver in color.  The clasp is a matching pewter S-hook that blends right in.  Currently the necklace is 25.5" in length - the winning bidder should let me know if this needs to be a bit longer or shorter.


As a bonus, I also made matching earrings with the vintage leaves from the fringe, and seed beads and peanuts from the strap.  The sterling silver loops are wire wrapped, and the ear wires are sterling too.  I can change the ear wires to hypoallergenic niobium should the winner require.  


Thank you for looking!  If you are not bidding on the auction, please share it far and wide with all your friends.  As always you can follow my beading exploits on my Facebook page, or shop my Etsy store at any time.  

Friday, September 26, 2014

Art Bead Scene September 2014 Challenge

Full disclosure, the main reason I started blogging again is because I've always wanted to be able to participate in all of the blog hops and challenges out there.  I am a weirdo that thrives with an assignment or deadline.  Usually I find that it pushes me to stretch outside my comfort zones, and that's always a good thing!  After all, you never know when someone is going to request a piece that is outside your comfort zone...I think of challenges as practice for that eventuality.

I was super ready for the Art Bead Scene blog monthly challenge...until I saw the art inspiration for this month.
You can read more about this gesso panel and the artist HERE.

Oh, if ever there was a palette that did NOT inspire me, this is it.  Where is all the color and tonal contrast?  I had to really look at this piece of art to find things that got my creative juices flowing - but that's what a challenge is all about.  I love all the different layers of texture and lines.  I love how subtle the faces are, and the small beads of saturated color in the midst of all the blandness.  I started pulling beads and components to work with (the step I always forget to take a picture of).  Shortly after starting this process, I came to the realization that I was going to have to get really creative with my seed bead choices...I simply don't have true matches to all the beigeness in my stash.

Luckily, I found some seed beads I though I could make work, along with one of my polymer clay faces, and lampwork beads by Valerie O'Neal and Sharon Ryman.  I captured the face, attached the lampwork, started adding some swooping lines of beads...and hit the Ugly Duckling Stage:
If you're not an artist or creative person of any type, you might not be familiar with this term.  The Ugly Duckling Stage (or UDS as I'll call it from now on), is a soul-sucking period in the creative process.  You're not sure why the piece isn't doing it for you, you're not sure how to fix it, you just know that it doesn't look good yet.  Often I find that the bigger or more conceptual the piece is, the longer the UDS lasts.  A lot of times people never make it past this stage in the process, resulting in a perpetual WIP (Work In Progress) or straight up UFO (UnFinished Object).  Part of my issue on this piece is that I wasn't looking at the inspiration picture while I was beading (yes, I was too busy watching Hulu to switch tabs)...so the piece took a bit of a departure from the direction I was intending.  So I called in some help from my online bead friends.  I showed several of them the inspiration art, and then the picture above and asked what was missing.  One said it needed more mauvey pink.  Another said it needed to be "pointy".  And after reading all of their comments, I could tell that the wispy texture that had inspired me in the first place was missing as well.  So I went back to work.
Definitely past the UDS now!  I addressed all of the issues brought up by my friends, and it's ready to have a necklace strap attached.  

Here are some pictures of the finished necklace, with a little bit more explanation:
I decided to go for a two strand neck strap, and each half of each strand is different.  The shorter inner strand is blue and silver-beige on the attached side, and spaced out mauvey pink on the clasped side.  The longer outer strand is garnet luster and silver beige on one side, and denser mauvey pink on the clasped side.  

Here is the centerpiece close up so you can see the artist beads.  I didn't even notice that this face had a beauty mark until I was photographing this necklace.  Valerie's large oval lampwork bead was such a great jumping off point for this necklace, and I love how Sharon's little bumpy bead plays on the texture in the inspiration art.

Here you can see the clasp situation a little clearer.  I used a metal cloak or jacket frog for the clasp.  I found the scroll work in the design appealing - it reminds me of the ornate designs of the early 20th century (the inspiration art was created in 1902).  I really wanted to incorporate the perfect mauvey pink vintage glass ring, and struggled a bit on just how to do that.  I finally decided to make a wire wrapped link to attach the ring, the two halves of the clasp, and a blue foiled Czech lampwork bead.  The clasp is actually used backwards from what it would be in a garment.  The wire links are strung through connects the normal stitching holes.  The hook side of the clasp grabs directly onto the mauve section of beadwork by the face!  The loop side of the clasp is what I crimped the two necklace strands to.  I do love a front closure!  And I feel like this solution breaks up a part of the necklace that could have gone overwhelmingly pink...   

Ah, the beauty shot!

Thank you all for looking once again!  Please make sure you visit the Art Bead Scene blog (I will edit this link then) on October 1st or 2nd to see all of the other awesome works inspired by this piece of art!  As always, you can keep up with me daily on Facebook, or check out my shop on Etsy.  


Thursday, September 25, 2014

Trip to Iowa 2014, the Goodies!

One of the things I love to do when visiting a new place is to go junking.  This consists of visiting every single thrift, charity, and antique store I can find, along with spur of the moment flea marketing and town festivals.  This can be especially fruitful in small towns, where dealers are less likely to realize what they have, and can't command big city prices anyway.  So here are my goodies from small town Iowa!


I've been looking for a Ganesh for awhile now - not your normal small altar statue, but something unique.  Who knew he would be hanging on the wall in a small oddity and antique store in Iowa?  And yes, he is a planter too...


I also got this little raku bell at the same shop.  It doesn't sound very nice, but it's so pretty!


Guinea fowl statue anyone?


I found this awesome tumbled slab of tiger iron that will make a great necklace for my boyfriend.

"Greek" brass masks...I'm determined that these are not too big for focals...

Carved serpentine fish focal.

Baggie of large rough cut seed beads...who could pass this up for 99 cents?

This is actually a bolo tie slide...I would love to meet the man that bought this!  I think it'll make a great necklace focal.

All of this was in a baggie for $2...what?  Yes.

Vintage glass necklaces from a variety of shops.

More organic necklaces - 4 strands of bone, cedar ghost berries, cultured pearls, and a necklace of mother of pearl rounds and really nice turquoise.  

Why did I buy this horrible thing?  Well, it was $1, the pendant is weird and interesting (capiz shell, peacock feather and resin), the wood donuts are useful, and the fur inlaid links were just too weird to pass up.

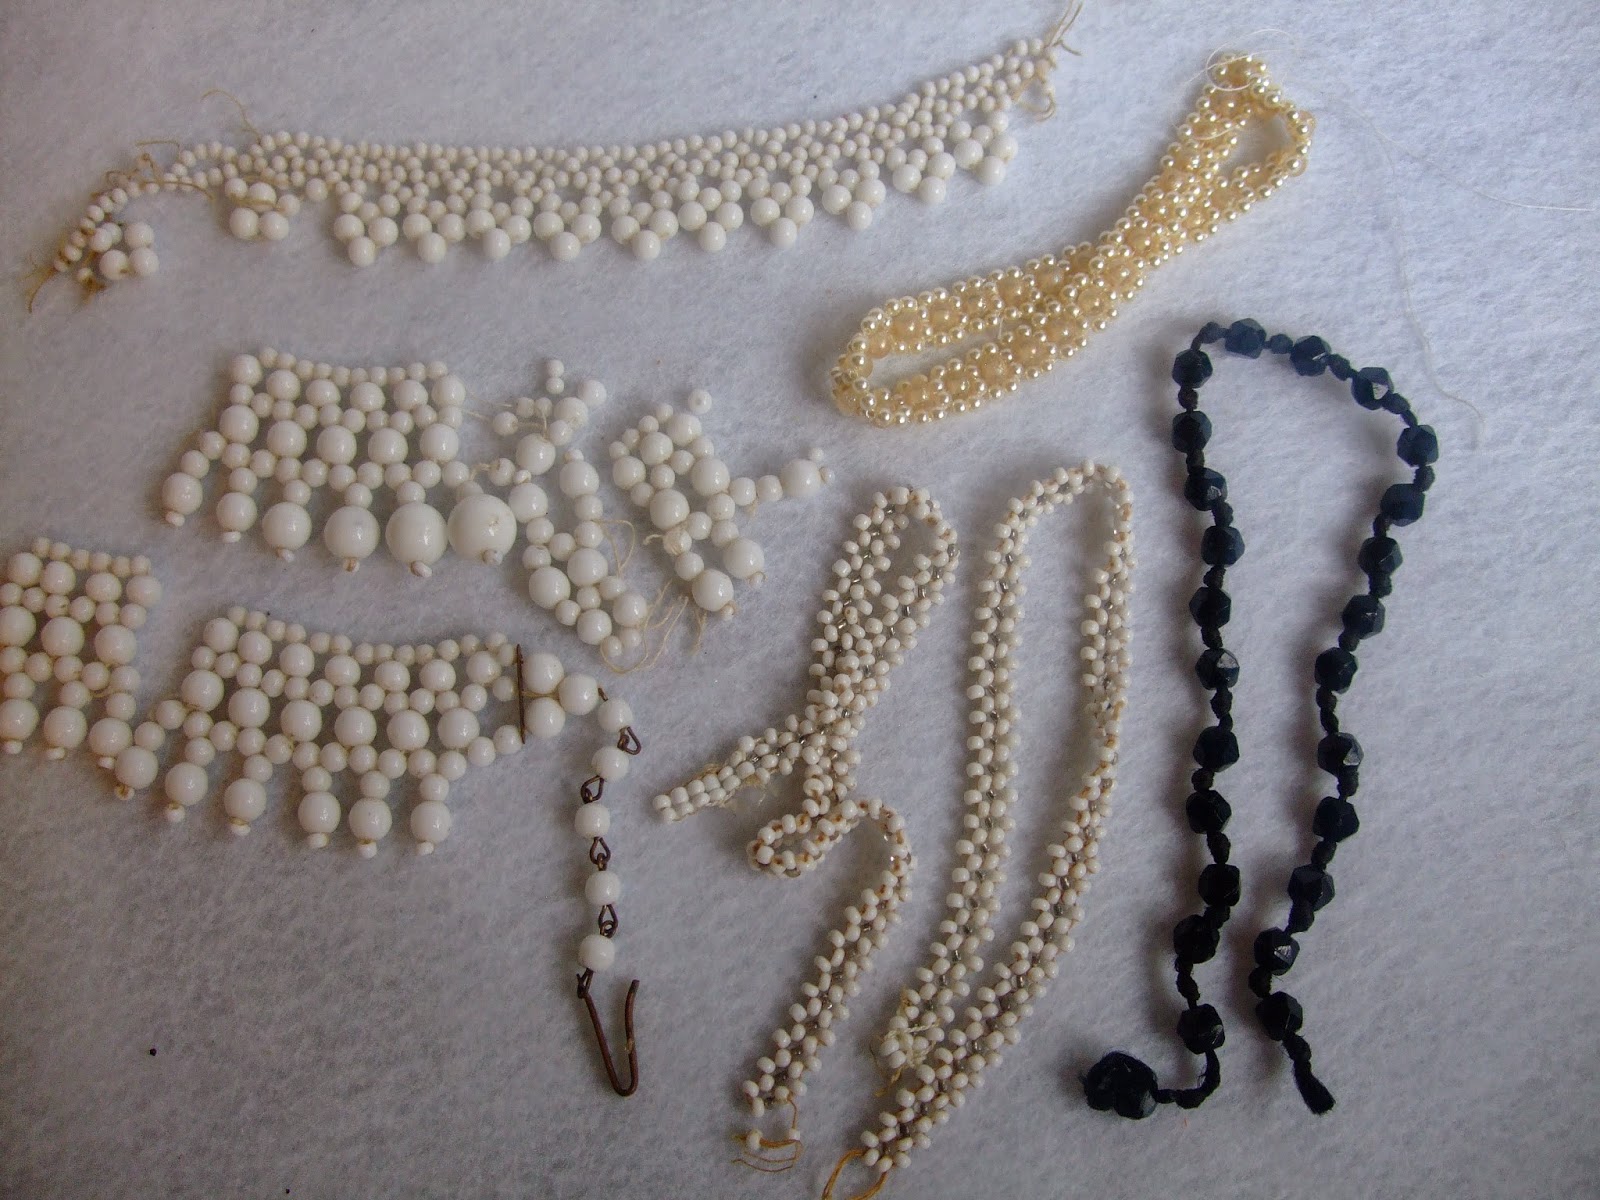
Bits and pieces of broken vintage beadwork.  I love finding stuff like this so I can retrace the threadpath and recreate it in new beads.

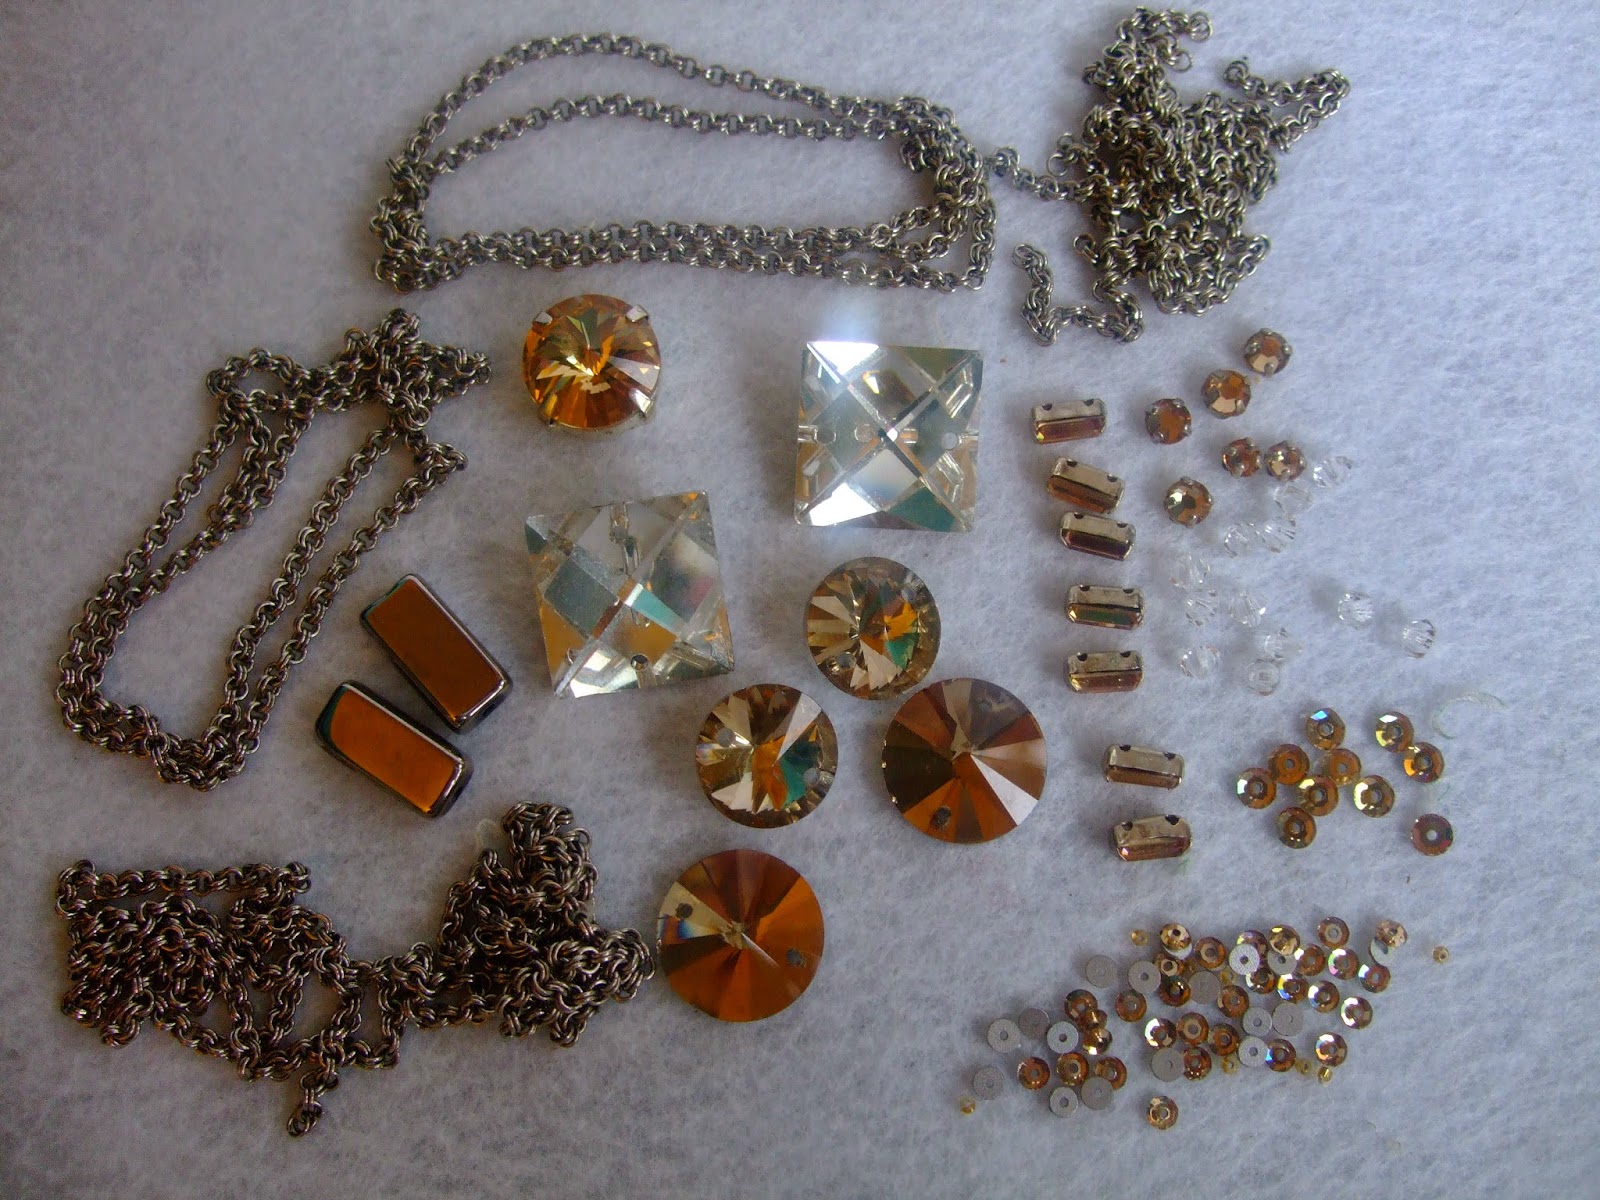
All of these crystals and chain (sterling chain I might add) came off of a broken necklace from the Goodwill...for $1...

Vintage glass buttons...I just can't say no.

Look at the texture on these!

When you're out and about, keep your eyes peeled for anything useful!  The trick is to start seeing old, broken, or costume jewelry as more than just it's current state.  It really is situation where the parts might be worth more to you than the whole piece.  Seriously, I buy garments at the thrift store on a regular basis, just because of the buttons.  You never know what you'll find if you keep your eyes peeled!  As always, you can keep track of my daily beadventures on my Facebook page, and in my Etsy shop.